Wednesday, July 24th, 2019
The latest version of my sec-tools project includes a new tool “sec-gather-http-headers“. It scans one of more URLs for security HTTP headers. As usual, you can use sec-diff to generate alerts about changes in the output and sec-report to generate a matrix overview of the headers for each URL.
The JSON output looks like this:
$ sec-gather-http-headers https://github.com/ https://gitlab.com/
{
    "http_headers": {
        "https://github.com/": {
            "Expect-CT": "max-age=2592000, report-uri=\"https://api.github.com/_private/browser/errors\"",
            "Feature-Policy": null,
            "Access-Control-Allow-Origin": null,
            "X-Frame-Options": "deny",
            "Referrer-Policy": "origin-when-cross-origin, strict-origin-when-cross-origin",
            "Access-Control-Allow-Headers": null,
            "X-XSS-Protection": "1; mode=block",
            "Strict-Transport-Security": "max-age=31536000; includeSubdomains; preload",
            "Public-key-pins": null,
            "Content-Security-Policy": "default-src 'none'; base-uri 'self'; block-all-mixed-content; connect-src 'self' uploads.github.com www.githubstatus.com collector.githubapp.com api.github.com www.google-analytics.com github-cloud.s3.amazonaws.com github-production-repository-file-5c1aeb.s3.amazonaws.com github-production-upload-manifest-file-7fdce7.s3.amazonaws.com github-production-user-asset-6210df.s3.amazonaws.com wss://live.github.com; font-src github.githubassets.com; form-action 'self' github.com gist.github.com; frame-ancestors 'none'; frame-src render.githubusercontent.com; img-src 'self' data: github.githubassets.com identicons.github.com collector.githubapp.com github-cloud.s3.amazonaws.com *.githubusercontent.com customer-stories-feed.github.com; manifest-src 'self'; media-src 'none'; script-src github.githubassets.com; style-src 'unsafe-inline' github.githubassets.com",
            "X-Content-Type-Options": "nosniff",
            "Access-Control-Allow-Methods": null
        },
        "https://gitlab.com/": {
            "Expect-CT": null,
            "Feature-Policy": null,
            "Access-Control-Allow-Origin": null,
            "X-Frame-Options": null,
            "Referrer-Policy": null,
            "Access-Control-Allow-Headers": null,
            "X-XSS-Protection": "1; mode=block",
            "Strict-Transport-Security": "max-age=31536000; includeSubdomains",
            "Public-key-pins": null,
            "Content-Security-Policy": "frame-ancestors 'self' https://gitlab.lookbookhq.com https://learn.gitlab.com;",
            "X-Content-Type-Options": "nosniff",
            "Access-Control-Allow-Methods": null
        }
    }
}
An example PDF output with a matrix overview:
http_headers
Monday, March 11th, 2019
If your WordPress installation updates just stops after showing the message “Unpacking the update”, try increasing the memory limit of PHP. Unzipping the update takes quite a bit of memory. Newer versions of WordPress keep getting larger and larger, requiring more memory to unpack. So it can suddenly break, as it did for me.
You may want to check the actual limit PHP is using by creating a small “php info” PHP page in your webroot and opening that in your browser. For example:
<?php
phpinfo();
?>
Name it something like “phpinfo_52349602384.php”. The random name is so that if you forget to remove the file, automated vulnerability scanners won’t find it. Open that file in the browser and the memory limit should be mentioned somewhere under “memory_limit”.
Monday, November 19th, 2018
I’m tired of using Make and its arcane syntax. 90% of the projects I write or deal with don’t require any kind of incremental compilation, but that’s all any build system talks about. That, and how insanely fast it is. The drawback is usually that you need to install several terabytes of dependencies, and then you need a 6-day course to learn how to actually write targets in it. I just want to convert some file formats, run a linter or execute some tests.
So I took an hour or two and wrote sla: the Simple Little Automator. (the name was chosen because ‘sla’ is easy to type; sorry).
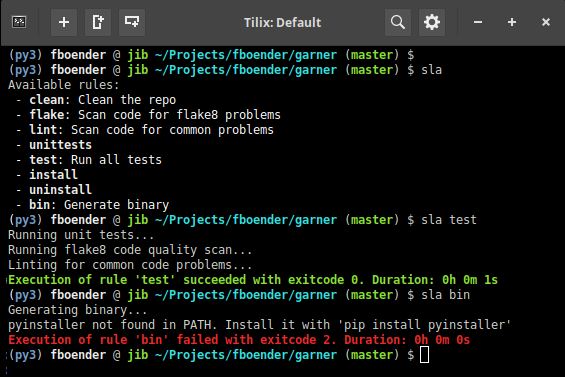
sla is simple. It’s just shell functions in a file called build.sla. The sla script searches your project for this file, and runs the requested function. Simple, elegant, powerful, extensible and portable. Here’s an example build.sla:
#
# This is a script containing functions that are used as build rules. You can
# use the Simple Little Automator (https://github.com/fboender/sla) to run
# these rules, or you can run them directly in your shell:
#
#   $ bash -c ". build.sla && test"
#

clean () {
    # Clean artifacts and trash from repo
    find ./ -name "*.pyc" -delete
    find ./ -name "*.tmp" -delete
}

test () {
    # Run some code tests
    clean  # Depend on 'clean' rule
    flake8 --exclude src/llt --ignore=E501 src/*.py
}
You can run rules with:
$ sla test
./src/tools.py:25:80: E501 line too long (111 > 79 characters)
Exection of rule 'test' failed with exitcode 2
The best thing is, since it’s simple shell functions, you don’t even need sla installed in order to run them! Sourcing the rules.sla file in your shell is all you need:
$ bash -c ". build.sla && test"
./src/tools.py:25:80: E501 line too long (111 > 79 characters)
Exection of rule 'test' failed with exitcode 2
More info and installation instructions can be found on the Github project page.
Saturday, October 27th, 2018
Just a quick note:
My multi-git-status project can now do a “git fetch” for each repo, before showing the status. This fetches the latest changes in the remote repository (without changing anything in your local checked out branch), so that mgitstatus will also show any “git pull”s you’d have to do.
Sunday, June 3rd, 2018
Over the course of a single day I might work on a dozen different admin or development projects. In the morning I could be hacking on some Zabbix monitoring scripts, in the afternoon on auto-generated documentation and in the evening on a Python or C project.
I try to keep my system clean and my projects as compartmentalized as possible, to avoid library version conflicts and such. When jumping from one project to another, the requirements of my shell environment can change significantly. One project may require /opt/nim/bin to be in my PATH. Another project might require a Python VirtualEnv to be active, or to have GOPATH set to the correct value. All in all, switching from one project to another incurs some overhead, especially if I haven’t worked on it for a while.
Wouldn’t it be nice if we could have our environment automatically set up simply by changing to the project’s directory? With direnv we can.
direnv is an environment switcher for the shell. It knows how to hook into bash, zsh, tcsh, fish shell and elvish to load or unload environment variables depending on the current directory. This allows project-specific environment variables without cluttering the ~/.profile file.
Before each prompt, direnv checks for the existence of a “.envrc” file in the current and parent directories. If the file exists (and is authorized), it is loaded into a bash sub-shell and all exported variables are then captured by direnv and then made available to the current shell.
It’s easy to use. Here’s a quick guide:
Install direnv (I’m using Ubuntu, but direnv is available for many Unix-like systems):
fboender @ jib ~ $ sudo apt install direnv
You’ll have to add direnv to your .bashrc in order for it to work:
fboender @ jib ~ $ tail -n1 ~/.bashrc
eval "$(direnv hook bash)"
In the base directory of your project, create a .envrc file. For example:
fboender @ jib ~ $ cat ~/Projects/fboender/foobar/.envrc
#!/bin/bash

# Settings
PROJ_DIR="$PWD"
PROJ_NAME="foobar"
VENV_DIR="/home/fboender/.pyenvs"
PROJ_VENV="$VENV_DIR/$PROJ_NAME"

# Create Python virtualenv if it doesn't exist yet
if [ \! -d "$PROJ_VENV" ]; then
    echo "Creating new environment"
    virtualenv -p python3 $PROJ_VENV
    echo "Installing requirements"
    $PROJ_VENV/bin/pip3 install -r ./requirements.txt
fi

# Emulate the virtualenv's activate, because we can't source things in direnv
export VIRTUAL_ENV="$PROJ_VENV"
export PATH="$PROJ_VENV/bin:$PATH:$PWD"
export PS1="(`basename \"$VIRTUAL_ENV\"`) $PS1"
export PYTHONPATH="$PWD/src"
This example automatically creates a Python3 virtualenv for the project if it doesn’t exist yet, and installs the dependencies. Since we can only export environment variables directly, I’m emulating the virtualenv’s bin/activate script by setting some Python-specific variables and exporting a new prompt.
Now when we change to the project’s directory, or any underlying directory, direnv tries to activate the environment:
fboender @ jib ~ $ cd ~/Projects/fboender/foobar/
direnv: error .envrc is blocked. Run `direnv allow` to approve its content.
This warning is to be expected. Running random code when you switch to a directory can be dangerous, so direnv wants you to explicitly confirm that it’s okay. When you see this message, you should always verify the contents of the .envrc file!
We allow the .envrc, and direnv starts executing the contents. Since the python virtualenv is missing, it automatically creates it and installs the required dependencies. It then sets some paths in the environment and changes the prompt:
fboender @ jib ~ $ direnv allow
direnv: loading .envrc
Creating new environment
Already using interpreter /usr/bin/python3
Using base prefix '/usr'
New python executable in /home/fboender/.pyenvs/foobar/bin/python3
Also creating executable in /home/fboender/.pyenvs/foobar/bin/python
Installing setuptools, pkg_resources, pip, wheel...done.
Installing requirements
Collecting jsonxs (from -r ./requirements.txt (line 1))
Collecting requests (from -r ./requirements.txt (line 2))
  Using cached https://files.pythonhosted.org/packages/49/df/50aa1999ab9bde74656c2919d9c0c085fd2b3775fd3eca826012bef76d8c/requests-2.18.4-py2.py3-none-any.whl
Collecting tempita (from -r ./requirements.txt (line 3))
Collecting urllib3<1.23,>=1.21.1 (from requests->-r ./requirements.txt (line 2))
  Using cached https://files.pythonhosted.org/packages/63/cb/6965947c13a94236f6d4b8223e21beb4d576dc72e8130bd7880f600839b8/urllib3-1.22-py2.py3-none-any.whl
Collecting chardet<3.1.0,>=3.0.2 (from requests->-r ./requirements.txt (line 2))
  Using cached https://files.pythonhosted.org/packages/bc/a9/01ffebfb562e4274b6487b4bb1ddec7ca55ec7510b22e4c51f14098443b8/chardet-3.0.4-py2.py3-none-any.whl
Collecting certifi>=2017.4.17 (from requests->-r ./requirements.txt (line 2))
  Using cached https://files.pythonhosted.org/packages/7c/e6/92ad559b7192d846975fc916b65f667c7b8c3a32bea7372340bfe9a15fa5/certifi-2018.4.16-py2.py3-none-any.whl
Collecting idna<2.7,>=2.5 (from requests->-r ./requirements.txt (line 2))
  Using cached https://files.pythonhosted.org/packages/27/cc/6dd9a3869f15c2edfab863b992838277279ce92663d334df9ecf5106f5c6/idna-2.6-py2.py3-none-any.whl
Installing collected packages: jsonxs, urllib3, chardet, certifi, idna, requests, tempita
Successfully installed certifi-2018.4.16 chardet-3.0.4 idna-2.6 jsonxs-0.6 requests-2.18.4 tempita-0.5.2 urllib3-1.22
direnv: export +PYTHONPATH +VIRTUAL_ENV ~PATH
(foobar) fboender @ jib ~/Projects/fboender/foobar (master) $
I can now work on the project without having to manually switch anything. When I’m done with the project and change to a different dir, it automatically unloads:
(foobar) fboender @ jib ~/Projects/fboender/foobar (master) $ cd ~
direnv: unloading
fboender @ jib ~ $
And that’s about it! You can read more about direnv on its homepage.
Saturday, June 2nd, 2018
Normally, an SSL/TLS client verifies the server’s certificate. It’s also possible for the server to require a signed certificate from the client. These are called Client Certificates. This ensures that not only can the client trust the server, but the server can also trusts the client.
Traditionally in Python, you’d pass the ca_certs parameter to the ssl.wrap_socket() function on the server to enable client certificates:
# Client
ssl.wrap_socket(s, ca_certs="ssl/server.crt", cert_reqs=ssl.CERT_REQUIRED,
                certfile="ssl/client.crt", keyfile="ssl/client.key")

# Server
ssl.wrap_socket(connection, server_side=True, certfile="ssl/server.crt",
                keyfile="ssl/server.key", ca_certs="ssl/client.crt")
Since Python v3.4, the more secure, and thus preferred method of wrapping a socket in the SSL/TLS layer is to create an SSLContext instance and call SSLContext.wrap_socket(). However, the SSLContext.wrap_socket() method does not have the ca_certs parameter. Neither is it directly obvious how to enable requirement of client certificates on the server-side.
The documentation for SSLContext.load_default_certs() does mention client certificates:
Purpose.CLIENT_AUTH loads CA certificates for client certificate verification on the server side.
But SSLContext.load_default_certs() loads the system’s default trusted Certificate Authority chains so that the client can verify the server‘s certificates. You generally don’t want to use these for client certificates.
In the Verifying Certificates section, it mentions that you need to specify CERT_REQUIRED:
In server mode, if you want to authenticate your clients using the SSL layer (rather than using a higher-level authentication mechanism), you’ll also have to specify CERT_REQUIRED and similarly check the client certificate.
I didn’t spot how to specify CERT_REQUIRED in either the SSLContext constructor or the wrap_socket() method. Turns out you have to manually set a property on the SSLContext on the server to enable client certificate verification, like this:
context = ssl.create_default_context(ssl.Purpose.CLIENT_AUTH)
context.verify_mode = ssl.CERT_REQUIRED
context.load_cert_chain(certfile=server_cert, keyfile=server_key)
context.load_verify_locations(cafile=client_certs)
Here’s a full example of a client and server who both validate each other’s certificates:
For this example, we’ll create Self-signed server and client certificates. Normally you’d use a server certificate from a Certificate Authority such as Let’s Encrypt, and would setup your own Certificate Authority so you can sign and revoke client certificates.
Create server certificate:
openssl req -new -newkey rsa:2048 -days 365 -nodes -x509 -keyout server.key -out server.crt
Make sure to enter ‘example.com’ for the Common Name.
Next, generate a client certificate:
openssl req -new -newkey rsa:2048 -days 365 -nodes -x509 -keyout client.key -out client.crt
The Common Name for the client certificate doesn’t really matter.
Client code:
#!/usr/bin/python3

import socket
import ssl

host_addr = '127.0.0.1'
host_port = 8082
server_sni_hostname = 'example.com'
server_cert = 'server.crt'
client_cert = 'client.crt'
client_key = 'client.key'

context = ssl.create_default_context(ssl.Purpose.SERVER_AUTH, cafile=server_cert)
context.load_cert_chain(certfile=client_cert, keyfile=client_key)

s = socket.socket(socket.AF_INET, socket.SOCK_STREAM)
conn = context.wrap_socket(s, server_side=False, server_hostname=server_sni_hostname)
conn.connect((host_addr, host_port))
print("SSL established. Peer: {}".format(conn.getpeercert()))
print("Sending: 'Hello, world!")
conn.send(b"Hello, world!")
print("Closing connection")
conn.close()
Server code:
#!/usr/bin/python3

import socket
from socket import AF_INET, SOCK_STREAM, SO_REUSEADDR, SOL_SOCKET, SHUT_RDWR
import ssl

listen_addr = '127.0.0.1'
listen_port = 8082
server_cert = 'server.crt'
server_key = 'server.key'
client_certs = 'client.crt'

context = ssl.create_default_context(ssl.Purpose.CLIENT_AUTH)
context.verify_mode = ssl.CERT_REQUIRED
context.load_cert_chain(certfile=server_cert, keyfile=server_key)
context.load_verify_locations(cafile=client_certs)

bindsocket = socket.socket()
bindsocket.bind((listen_addr, listen_port))
bindsocket.listen(5)

while True:
    print("Waiting for client")
    newsocket, fromaddr = bindsocket.accept()
    print("Client connected: {}:{}".format(fromaddr[0], fromaddr[1]))
    conn = context.wrap_socket(newsocket, server_side=True)
    print("SSL established. Peer: {}".format(conn.getpeercert()))
    buf = b''  # Buffer to hold received client data
    try:
        while True:
            data = conn.recv(4096)
            if data:
                # Client sent us data. Append to buffer
                buf += data
            else:
                # No more data from client. Show buffer and close connection.
                print("Received:", buf)
                break
    finally:
        print("Closing connection")
        conn.shutdown(socket.SHUT_RDWR)
        conn.close()
Output from the server looks like this:
$ python3 ./server.py
Waiting for client
Client connected: 127.0.0.1:51372
SSL established. Peer: {'subject': ((('countryName', 'AU'),),
(('stateOrProvinceName', 'Some-State'),), (('organizationName', 'Internet
Widgits Pty Ltd'),), (('commonName', 'someclient'),)), 'issuer':
((('countryName', 'AU'),), (('stateOrProvinceName', 'Some-State'),),
(('organizationName', 'Internet Widgits Pty Ltd'),), (('commonName',
'someclient'),)), 'notBefore': 'Jun  1 08:05:39 2018 GMT', 'version': 3,
'serialNumber': 'A564F9767931F3BC', 'notAfter': 'Jun  1 08:05:39 2019 GMT'}
Received: b'Hello, world!'
Closing connection
Waiting for client
Output from the client:
$ python3 ./client.py
SSL established. Peer: {'notBefore': 'May 30 20:47:38 2018 GMT', 'notAfter':
'May 30 20:47:38 2019 GMT', 'subject': ((('countryName', 'NL'),),
(('stateOrProvinceName', 'GLD'),), (('localityName', 'Ede'),),
(('organizationName', 'Electricmonk'),), (('commonName', 'example.com'),)),
'issuer': ((('countryName', 'NL'),), (('stateOrProvinceName', 'GLD'),),
(('localityName', 'Ede'),), (('organizationName', 'Electricmonk'),),
(('commonName', 'example.com'),)), 'version': 3, 'serialNumber':
'CAEC89334941FD9F'}
Sending: 'Hello, world!
Closing connection
A few notes:
- You can concatenate multiple client certificates into a single PEM file to authenticate different clients.
- You can re-use the same cert and key on both the server and client. This way, you don’t need to generate a specific client certificate. However, any clients using that certificate will require the key, and will be able to impersonate the server. There’s also no way to distinguish between clients anymore.
- You don’t need to setup your own Certificate Authority and sign client certificates. You can just generate them with the above mentioned openssl command and add them to the trusted certificates file. If you no longer trust the client, just remove the certificate from the file.
- I’m not sure if the server verifies the client certificate’s expiration date.
Tuesday, May 1st, 2018
Update 2021-02-25: (Disclaimer: I’m not a cryptographer, and not affiliated or sponsored by Passbolt in any way, shape or form). I’ve reviewed another Open Source personal and team password manager called Passbolt. Without going into a full review, its security looks impressive. Passbolt uses plain, old, trusted GPG with asymmetric public / private key encryption to encrypt and share secrets. Secrets are end-to-end encrypted, and a separate browser plugin is used for the client-side encryption. This (apparently) makes the crypto safer than plain Javascript client-side encryption. (yada,, yada, CPRNG) This architecture is also more resilient against server-side breaches, as an attacker that gains access to the server cannot inject code into the javascript, given that it’s a separate plugin. The private key never leaves your client, as far as I can tell. The Open Source version does not support 2FA, however it already requires the private key and a password (with which the private key is encrypted). So basically it’s already 2FA by design. Passbolt is slightly less easier to use, but for team-based password sharing, I highly recommend it.
Update: Kyle Spearrin, the lead developer of Bitwarden, contacted me regarding this blog post. Some issues (unnecessary loading of resources from CDNs and disclosure of my email address to a third-party without confirmation) have already been resolved. Mitigations for other issues were already in place, although I haven’t had time to confirm this yet. I’ll update this post with more details as soon possible.
Bitwarden is an open source online password manager:
The easiest and safest way for individuals, teams, and business organizations to store, share, and sync sensitive data.
Bitwarden offers both a cloud hosted and on-premise version. Some notes on the scope of this blog post and disclaimers:
- I only looked at the cloud hosted version.
- This security review is not exhaustive, I only took about a few minutes to review various things.
- I’m not a security researcher, just a paranoid enthusiast. If you find anything wrong with this blog post, please contact me at ferry DOT boender (AT) gmaildotcom.
Here are my findings:
Encryption password sent over the wire
There appears to be no distinction between the authentication password and encryption password.
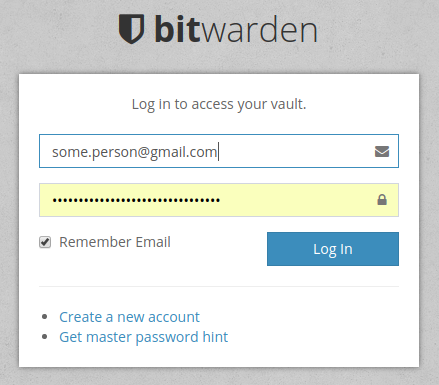
When logging in, the following HTTP POST is made to Bitwarden’s server:
client_id: web
grant_type: password
password: xFSJdHvKcrYQA0KAgOlhxBB3Bpsuanc7bZIKTpskiWk=
scope: api offline_access
username: some.person@gmail.com
That’s a base64 encoded password. (Don’t worry, I anonymized all secrets in this post, besides, it’s all throw-away passwords anyway). Lets see what it contains:
>>> import base64
>>> base64.b64decode('xFSJdHvKcrYQA0KAgOlhxBB3Bpsuanc7bZIKTpskiWk=')
b'p\x54\xde\x35\xb6\x90\x992\x63bKn\x7f\xfbb\xb2\x94t\x1b\xe9f\xez\xeaz}e\x142X#\xbd\x1c'
Okay, at least that’s not my plain text password. It is encoded, hashed or encrypted somehow, but I’m not sure how. Still, it makes me nervous that my password is being sent over the wire. The master password used for encryption should never leave a device, in any form. I would have expected two password here perhaps. One for authentication and one for encryption.
The reason it was implemented this way is probably because of the “Organizations” feature, which lets you share passwords with other people. Sharing secrets among people is probably hard to do in a secure way. I’m no cryptography expert, but there are probably ways to do this more securely using asymmetric encryption (public and private keys), which Bitwarden doesn’t appear to be using.
Bitwarden has a FAQ entry about its use of encryption, which claims that passwords are never sent over the wire unencrypted or unhashed:
Bitwarden always encrypts and/or hashes your data on your local device before it is ever sent to the cloud servers for syncing. The Bitwarden servers are only used for storing encrypted data. It is not possible to get your unencrypted data from the Bitwarden cloud servers.
The FAQ entry on hashing is also relevant:
Bitwarden salts and hashes your master password with your email address on the client (your computer/device) before it is transmitted to our servers. Once the server receives the hashed password from your computer/device it is then salted again with a cryptographically secure random value, hashed again and stored in our database. This process is repeated and hashes are compared every time you log in.
The hashing functions that are used are one way hashes. This means that they cannot be reverse engineered by anyone at Bitwarden to reveal your true master password. In the hypothetical event that the Bitwarden servers were hacked and your data was leaked, the data would have no value to the hacker.
However, there’s a major caveat here which they don’t mention. All of the encryption is done client-side by Javascript loaded from various servers and CDNs. This means that an attacker who gains control over any of these servers (or man-in-the-middle’s them somehow) can inject any javascript they like, and obtain your password that way.
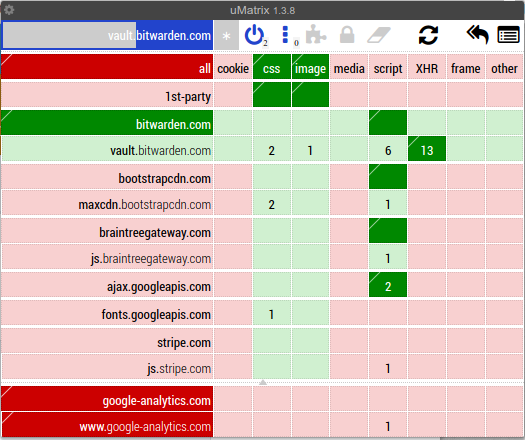
Indiscriminate allowance / loading of external resources
The good news is that Bitwarden uses Content-Security-Policy. The bad news is that it allows the loading of resources from a variety of untrusted sources. uMatrix shows the type of resources it’s trying to load from various sources:
Here’s what the Content-Security-Policy looks like:
content-security-policy:
   default-src
      'self';
   script-src
      'self'
      'sha256-ryoU+5+IUZTuUyTElqkrQGBJXr1brEv6r2CA62WUw8w='
      https://www.google-analytics.com
      https://js.stripe.com
      https://js.braintreegateway.com
      https://www.paypalobjects.com
      https://maxcdn.bootstrapcdn.com
      https://ajax.googleapis.com;
   style-src
      'self'
      'unsafe-inline'
      https://maxcdn.bootstrapcdn.com
      https://assets.braintreegateway.com
      https://*.paypal.com
      https://fonts.googleapis.com;
   img-src
      'self'
      data:
      https://icons.bitwarden.com
      https://*.paypal.com
      https://www.paypalobjects.com
      https://q.stripe.com
      https://haveibeenpwned.com
      https://chart.googleapis.com
      https://www.google-analytics.com;
   font-src
      'self'
      https://maxcdn.bootstrapcdn.com
      https://fonts.gstatic.com;
   child-src
      'self'
      https://js.stripe.com
      https://assets.braintreegateway.com
      https://*.paypal.com
      https://*.duosecurity.com;
   frame-src
      'self'
      https://js.stripe.com
      https://assets.braintreegateway.com
      https://*.paypal.com
      https://*.duosecurity.com;
Roughly translated, it allows indiscriminate loading and executing of scripts, css, web workers (background threads) and inclusion of framed content from a wide variety of untrusted sources such as CDNs, Paypal, Duosecurity, Braintreegateway, Google, etc. Some of these I know, some I don’t. Trust I have in none of them.
It would take too long to explain why this is a bad idea, but the gist of it is that the more resources you load and allow from different sources, the bigger the attack surface becomes. Perhaps these are perfectly secure (right now…), but an import part of security is the developers’ security mindset. Some of these resources could have easily been hosted on the same origin servers. Some of these resources should only be allowed to run from payment pages. It shows sloppy configuration of the Content-Security-Policy, namely site-wide configuration in the web server (probably) rather than being determined on an URL by URL basis.
The actual client-side encryption library is loaded from vault.bitwarden.com, which is good. However, the (possibility of) inclusion of scripts from other sources negates any security benefits of doing so.
The inclusion of Google analytics in a password manager is, in my opinion, inexcusable. It’s not required functionality for the application, so it shouldn’t be in there.
New password entry is sent securely
When adding a new authentication entry, the entry appears to be client-side encrypted in some way before sending it to the server:
{
    "name": "2.eD4fFLYUWmM6sgVDSA9pTg==|SNzQjLitpA5K+6qrBwC7jw==|DlfVCnVdZA9+3oLej4FHSQwwdo/CbmHkL2TuwnfXAoI=",
    "organizationId": null,
    "fields": null,
    "notes": null,
    "favorite": false,
    "login": {
        "username": null,
        "password": "2.o4IO/yzz6syip4UEaU4QpA==|LbCyLjAOHa3m2wopsqayYK9O7Q5aqnR8nltUgylwSOo=|6ajVAh0r9OaBs+NgLKrTd+j3LdBLKBUbs/q8SE6XvUE=",
        "totp": null
    },
    "folderId": null,
    "type": 1
}
It’s base64 again, and decodes into the same obscure binary string as the password when logging in. I have not spent time looking at how exactly the encoding / encryption is happening, so I cannot claim that this is actually secure. So keep that in mind. It does give credence to Bitwarden’s claims that all sensitive data is encrypted client-side before sending it to the server.
Disclosure of my email address to a third part without my consent
I clicked on the “Data breach report” link on the left, and Bitwarden immediately sent my email address to https://haveibeenpwned.com. No confirmation, no nothing; it was disclosed to a third party immediately. Well, actually, since I use uMatrix to firewall my browser, it wasn’t and I had to explicitly allow it to do so, but even most security nerds don’t use uMatrix.

That’s not cool. Don’t disclose my info to third parties without my consent.
Developer mindset
One of, if not the, most important aspects is the developer mindset. That is, do they care about security and are they knowledgeable in the field?
Bitwarden appears to know what they’re doing. They have a security policy and run a bug bounty program. Security incidents appear to be solved quickly. I’d like to see more documentation on how the encryption, transfer and storage of secrets works. Right now, there are some FAQ entries, but it’s all promisses that give me no insight into where and how the applied security might break down.
One thing that bothers me is that they do not disclose any of the security trade-offs they made and how it impacts the security of your secrets. I’m always weary when claims of perfect security are made, whether explicitely, or by omission of information. There are obvious problems with client-side javascript encryption, which every developer and user with an reasonable understanding of web developers recognises. No mention of this is made. Instead, security concerns are waved away with “everything is encrypted on your device!”. That’s nice, but if attackers can control the code that does the encryption, all is lost.
Please note that I’m not saying that client-side javascript encryption is a bad decision! It’s a perfectly reasonable trade-off between the convenience of being able to access your secrets on all your devices and a more secure way of managing your passwords. However, this trade-off should be disclosed prominently to users.
Conclusion
So, is Bitwarden (Cloud) secure and should you use it? Unfortunately, I can’t give you any advice. It all depends on your requirements. All security is a tradeoff between usability, convenience and security.
I did this review because my organisation is looking into a self-hosted Open Source password manager to manage our organisation’s secrets. Would I use this to keep my personal passwords in? The answer is: no. I use an offline Keepass, which I manually sync from my laptop to my phone every now and then. This is still the most secure way of managing passwords that I do not need to share with anyone. However, that’s not the use-case that I reviewed Bitwarden for. So would I use it to manage our organisation’s secrets? Perhaps, the jury is still out on that. I’ll need to look at the self-hosted version to see if it also includes Javascript from unreliable sources. If so, I’d have to say that, no, I would not recommend Bitwarden.
Sunday, April 8th, 2018
Just a quick update on Multi-git-status. It now also shows branches with no upstream. These are typically branches created locally that haven’t been configured to track a local or remote branch. Any changes in those branches are lost when the repo is removed from your machine. Additionally, multi-git-status now handles branches with slashes in them properly. For example, “feature/loginscreen”. Here’s how the output looks now:
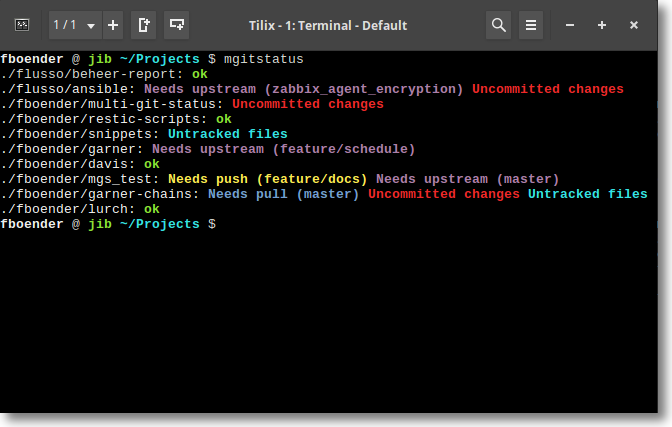
You can get multi-git-status from the Github page.
Sunday, March 18th, 2018
Here’s a very quick note:
I’ve been using the Restic backup tool with the SFTP backend for a while now, and so far it was great. Until I tried to prune some old backups. It takes two hours to prune 1 GiB of data from a 15 GiB backup. During that time, you cannot create new backups. It also consumes a huge amount of bandwidth when deleting old backups. I strongly suspect it downloads each blob from the remote storage backend, repacks it and then writes it back.
I’ve seen people on the internet with a few hundred GiB worth of backups having to wait 7 days to delete their old backups. Since the repo is locked during that time, you cannot create new backups.
This makes Restic completely unusable as far as I’m concerned. Which is a shame, because other than that, it’s an incredible tool.
Sunday, March 4th, 2018
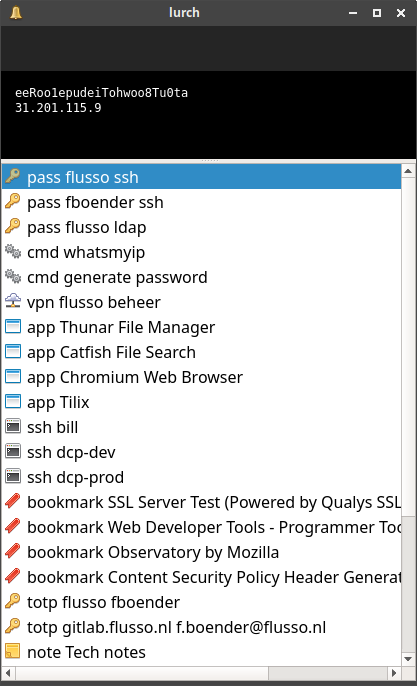
I cobbled together a unixy command / application launcher and auto-typer. I’ve dubbed it Lurch.
Features:
- Fuzzy filtering as-you-type.
- Execute commands.
- Open new browser tabs.
- Auto-type into currently focussed window
- Auto-type TOTP / rfc6238 / two-factor / Google Authenticator codes.
- Unixy and composable. Reads entries from stdin.
You can use and combine these features to do many things:
- Auto-type passwords
- Switch between currently opened windows by typing a part of its title (using wmctrl to list and switch to windows)
- As a generic (and very customizable) application launcher by parsing .desktop entries or whatever.
- Quickly
cd to parts of your filesystem using auto-type.
- Open browser tabs and search via google or specific search engines.
- List all entries in your SSH configuration and quickly launch an ssh session to one of them.
- Etc.
You’ll need a way to launch it when you press a keybinding. That’s usually the window manager’s job. For XFCE, you can add a keybinding under the Keyboard -> Application Shortcuts settings dialog.
Here’s what it looks like:
Unfortunately, due to time constraints, I cannot provide any support for this project:
NO SUPPORT: There is absolutely ZERO support on this project. Due to time constraints, I don’t take bug or features reports and probably won’t accept your pull requests.
You can get it from the Github page.
The text of all posts on this blog, unless specificly mentioned otherwise, are licensed under this license.
